Showing posts with label eyes. Show all posts
Showing posts with label eyes. Show all posts
Friday, June 18, 2010
Mrs. Kindron
Finally, the last of the teachers' portraits for the year. Next year I'll try not to kill myself by putting these off until May. I hate stressing about whether or not I'll be able to complete the last one.


Tuesday, June 8, 2010


Thursday, May 13, 2010
Mr. Patterson - Final
OK, so I'm under a little pressure to complete four portraits for my children's teachers by the time school gets out. Here's the first one, Aidan's teacher, Mr. Patterson. He's got a great face for drawing - lots of character. Hopefully I did him justice. You never know how they'll react. Mrs. Gleaves remarked that I put in her wrinkles, but she still liked it. We'll see what Mr. Patterson thinks when I give it to him next month...


Friday, September 11, 2009
Miss Cynthia - WIP 1
I ran out of time at the end of the last school year and couldn't get a portrait of Miss Cynthia, my son's preschool assistant teacher, done in time. And I didn't have a reference photo I was happy with. I managed to find one and have spent a few weeks working on this so far - I hope to have it done in a week or so, and then I'll be able to give it to Miss Cynthia.

This is the first portrait I've done on Bristol Smooth paper, and so far, I really like it. I know it doesn't have much tooth, so I'm trying not to use the blending stump very much - only in the larger areas of skin to even them out.

This is the first portrait I've done on Bristol Smooth paper, and so far, I really like it. I know it doesn't have much tooth, so I'm trying not to use the blending stump very much - only in the larger areas of skin to even them out.
Saturday, June 6, 2009
Mrs. Lewis - WIP 1
Here is the last of my three sons' teachers' portraits, this time of my youngest's preschool teacher. Can I finish it by Thursday, his last day of school? Probably not, but I'll try.


Thursday, May 7, 2009
Mrs. Harrison - WIP 1
I'm not sure I like where this one is going. I think I'm fussing with it too much. Part of the problem is I have a low quality reference photo to work with. In any case, I think I'm done with Mrs. Harrison's face. I'll start on her hair next.


Monday, April 13, 2009
Mrs. Gleaves - WIP 1
Wow, it's been a long time since I actually sat down to draw something other than the things I do for my sons. After having taken my first drawing class, you'd think I'd be doing more of this!
Here's the first of a set that I'm working on - one for each of my sons' teachers. I decided to start with Aidan's teacher, Mrs. Gleaves, only because hers is the best photo to work with. I'm pretty much done with her face, and I'll be starting her hair next. I wasn't very happy with this to begin with, but it's growing on me. Once I added her eyelashes, it seemed to start actually looking like her. Anyway, I plan on finishing these before the end of the school year, so I can give them to my sons' teachers to thank them for all their hard work. Wish me luck.

Here's the first of a set that I'm working on - one for each of my sons' teachers. I decided to start with Aidan's teacher, Mrs. Gleaves, only because hers is the best photo to work with. I'm pretty much done with her face, and I'll be starting her hair next. I wasn't very happy with this to begin with, but it's growing on me. Once I added her eyelashes, it seemed to start actually looking like her. Anyway, I plan on finishing these before the end of the school year, so I can give them to my sons' teachers to thank them for all their hard work. Wish me luck.

Thursday, July 3, 2008
Helena - WIP 1
I wasn't intending to do this as my next drawing, but I saw a picture of my neighbor's daughter and thought it was adorable. I especially liked the innocent look and the lighting of it. I hope I can do it justice. This will be another surprise, since they don't know I'm doing it. I'm pretty much done with the face, but I may do some touch-ups. Next will be the hair...


Saturday, May 17, 2008
John - WIP 1
I decided for my next portrait to do my brother-in-law, who passed away a year ago. My sister-in-law has always been one of the first to see my drawings, and she has been very kind in her compliments, so I know this will mean a lot to her. I just hope there aren't too many tears when she sees it. I don't really like doing a portrait where the subject is looking directly at the viewer, but I only had so many photos to work with, and I want this to be a surprise. Unfortunately, I have a pretty low quality photo to work with.


Saturday, April 12, 2008
Mary - WIP 1
To round out the portraits of my nuclear family, here's one I'm working on of my wife, Mary. I'm going to do my best to finish this by Mother's Day so I can give it to her then. This was tricky because of her glasses, but hopefully I did OK. They could probably still use some touching up.
This is 9x12" Arches HP WC 140 lb paper, and so far, I've only used a 2B mechanical pencil with some F pencil for the skin. I've tried used a stump this time, which I haven't done before, and I rather like it. For the larger skin areas, I'll be using a chamois again.

This is 9x12" Arches HP WC 140 lb paper, and so far, I've only used a 2B mechanical pencil with some F pencil for the skin. I've tried used a stump this time, which I haven't done before, and I rather like it. For the larger skin areas, I'll be using a chamois again.

Friday, February 22, 2008
Cole - WIP 1
It's hard to believe, but it took me four months to get around to starting my next portrait of my son Cole. After I took a break, it was hard for me to get started again - like had happened before, I lost my confidence and dragged my feet. After I started, though, I felt like I could do him justice. We'll see how it turns out.


Monday, August 27, 2007
Aidan - WIP 1
After I finished Grant's portrait, I felt very proud - I had never been so proud of one of my drawings before. I spent many hours on it, and took my time, applying lessons I'd learned from books and from my friends at the ArtPapa forums. I already had a photo of Aidan picked out that I wanted to use for the next one, but after a while, I realized I was dragging my feet about it. One day it occured to me that what was preventing me from working on another portrait was a fear of failure. I was afraid that I couldn't do as well (not to mention better) on another portrait as I'd done on Grant's. I don't expect my skills to improve markedly from one drawing to the next, but I do expect to learn from my mistakes, if nothing else. Still, weeks went by and I couldn't bring myself to start Aidan's portrait until one day I forced myself to.
I'm using a new paper, Arches 140 lb. Hot Pressed Watercolor, and graphite.

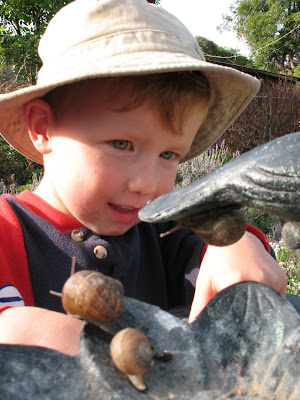
I'm using a new paper, Arches 140 lb. Hot Pressed Watercolor, and graphite.


Friday, July 13, 2007
Grant WIP 1
I'm taking a little break from eye studies - I literally have 20 or so sources for my studies, and it's become a little overwhelming (and repetitive). After studying Vanderpoel, it's all downhill from there anyway.
Having recently read J.D. Hillberry's "Drawing Realistic Textures in Pencil" and Lee Hammond's "How to Draw Lifelike Portraits from Photographs", I decided to try just that - drawing a portrait from a photograph. I chose my youngest son, Grant, whose 18 month portaits were taken just a couple of months ago. I liked the expression on his face in this one, and thought it would make a good model for my first serious portrait attempt. I've spent a few lunch hours and an evening on it so far, and have used mostly F, 2B and 3B graphite with just a little charcoal for the eyes and some accents. I think overall it's pretty good, but I may need to lighten it up a bit. I'm worried about the hair, because I haven't really had much experience doing realistic hair. We'll see how it goes.


Having recently read J.D. Hillberry's "Drawing Realistic Textures in Pencil" and Lee Hammond's "How to Draw Lifelike Portraits from Photographs", I decided to try just that - drawing a portrait from a photograph. I chose my youngest son, Grant, whose 18 month portaits were taken just a couple of months ago. I liked the expression on his face in this one, and thought it would make a good model for my first serious portrait attempt. I've spent a few lunch hours and an evening on it so far, and have used mostly F, 2B and 3B graphite with just a little charcoal for the eyes and some accents. I think overall it's pretty good, but I may need to lighten it up a bit. I'm worried about the hair, because I haven't really had much experience doing realistic hair. We'll see how it goes.


Tuesday, July 10, 2007
Eye Studies Part 6: Gary Faigin, "The Artist's Complete Guide to Facial Expressions"
There are lots of books that describe themselves as "definitive", but I haven't seen many that live up to that description as well as Gary Faigin's book, "The Artist's Complete Guide to Facial Expressions". Faigin not only goes into great detail about facial structures, and what the artist should be aware of above and below the surface, but it backs each observation up with numerous illustrations. This book rivals Vanderpoel's book in its detailed analysis of the underlying structure of the face, and it focuses mainly on what makes one face different from another, and how facial expressions change its appearance.


Monday, June 25, 2007
Eye Studies Part 5: George Bridgman, "Constructive Anatomy"
I've read that you either love Bridgman or you hate him. I tend not to like him so much, because his drawings, even though they are intended to give anatomical instruction, are more like grotesque exaggerations of human anatomy. Peoples' bodies don't really look like they do in his drawings - they're more like comic book illustrations where every feature is blown out of proportion. Perhaps this is to draw the student's attention to certain features. In any case, I find it distracting.
The section "The Eye" in Bridgman's book "Constructive Anatomy" (available for download from Internet Archive) contains a brief description of the anatomy of the eye structure, followed by several pages of Bridgman's eye drawings ("The Eye Socket: Wedges, Planes and Their Angles", "The Eye: Angular Opening Between the Lids", and "The Eye"). I did appreciate Bridgman's text, which is reminiscent of John Vanderpoel's descriptions (both books date from the early part of the 20th century), not just in its wording but how the matter is approached.


The section "The Eye" in Bridgman's book "Constructive Anatomy" (available for download from Internet Archive) contains a brief description of the anatomy of the eye structure, followed by several pages of Bridgman's eye drawings ("The Eye Socket: Wedges, Planes and Their Angles", "The Eye: Angular Opening Between the Lids", and "The Eye"). I did appreciate Bridgman's text, which is reminiscent of John Vanderpoel's descriptions (both books date from the early part of the 20th century), not just in its wording but how the matter is approached.


Wednesday, May 30, 2007
Eye Studies Part 4: JR Dunster, "How to Draw Eyes"
portrait-artist.org is "a portrait art tutorial site, with lessons on sketching and drawing faces, tutorials on digital art, an overview of art and drawing techniques, art supplies, book recommendations, anatomy, and much more." JR Dunster has created many tutorials to help aspiring artists who have an interest in drawing portraits.
Dunster's tutorial, "How to draw eyes, step-by-step drawing lesson", demonstrates to the reader how to perceive the eye, as well as how to render it in a drawing. He begins with a description of how to "see" the eye (Dunster recommends Betty Edwards' excellent "Drawing on the Right Side of the Brain" to his readers), using illustrations to show the eye's depth and shape, and reminds the reader not to forget the thickness of the eyelids (or the "tear duct thingie"!), and shows the subtle angles of the top lid. An important point that Dunster reiterates for the reader is that the iris is perfectly round, as is the pupil, which is perfectly centered within it. This seems like a simple point, but it's an important one - I've seen many drawings in which the iris is not round, nor is the pupil correctly centered.
After the overview of what to look for in the eye, Dunster goes into how he renders it, going over shading the iris for realism and shading the eyeball and adding eyelashes.
Ironically, his step-by-step diagram on how to draw the eye is, after four pages of overview, very brief. It consists of drawing an outline, followed by drawing in the lower lid, pupil, and highlight, and then adding shading and detail. To be fair, not only is most of this covered in the preceding pages, but as Dunster mentions, he does expect his reader to have some experience in drawing.
I did appreciate his "quick step-by-step of the eyebrow", which comes next, as it was useful to see how the shading should be deeper below the "brow line".
The last part of the tutorial is a brief description of what to notice when viewing the eye from the side.
I got many useful bits of information and tips from Dunster's tutorial, including his illustration of the basic shape of the eye (the widest part of the top of the eye is further in than the widest part of the bottom of the eye), and his suggestion about "suggesting" the thickness of the lower eyelid. I also thought it was useful to know that the upper eyelid covers about 1/3 (sometimes more) of the iris, and that the "white" of the eye is actually a "very, very pale peach, or pale greyish-peach" (I'm color blind and would never have noticed that).
Here are my eye sketches following Dunster's tutorial - the first is based on the one he uses in the tutorial, and the second is based on a photo of an eye, using Dunster's steps and mimicking his style.

Up next: Gary Faigin's "The Artist's Complete Guide to Facial Expressions"
Dunster's tutorial, "How to draw eyes, step-by-step drawing lesson", demonstrates to the reader how to perceive the eye, as well as how to render it in a drawing. He begins with a description of how to "see" the eye (Dunster recommends Betty Edwards' excellent "Drawing on the Right Side of the Brain" to his readers), using illustrations to show the eye's depth and shape, and reminds the reader not to forget the thickness of the eyelids (or the "tear duct thingie"!), and shows the subtle angles of the top lid. An important point that Dunster reiterates for the reader is that the iris is perfectly round, as is the pupil, which is perfectly centered within it. This seems like a simple point, but it's an important one - I've seen many drawings in which the iris is not round, nor is the pupil correctly centered.
After the overview of what to look for in the eye, Dunster goes into how he renders it, going over shading the iris for realism and shading the eyeball and adding eyelashes.
Ironically, his step-by-step diagram on how to draw the eye is, after four pages of overview, very brief. It consists of drawing an outline, followed by drawing in the lower lid, pupil, and highlight, and then adding shading and detail. To be fair, not only is most of this covered in the preceding pages, but as Dunster mentions, he does expect his reader to have some experience in drawing.
I did appreciate his "quick step-by-step of the eyebrow", which comes next, as it was useful to see how the shading should be deeper below the "brow line".
The last part of the tutorial is a brief description of what to notice when viewing the eye from the side.
I got many useful bits of information and tips from Dunster's tutorial, including his illustration of the basic shape of the eye (the widest part of the top of the eye is further in than the widest part of the bottom of the eye), and his suggestion about "suggesting" the thickness of the lower eyelid. I also thought it was useful to know that the upper eyelid covers about 1/3 (sometimes more) of the iris, and that the "white" of the eye is actually a "very, very pale peach, or pale greyish-peach" (I'm color blind and would never have noticed that).
Here are my eye sketches following Dunster's tutorial - the first is based on the one he uses in the tutorial, and the second is based on a photo of an eye, using Dunster's steps and mimicking his style.

Up next: Gary Faigin's "The Artist's Complete Guide to Facial Expressions"
Eye Studies Part 3: Brian Duey, "How to Draw a Realistic Eye"
From Vanderpoel's idealized eyes to Blake and Lawn's sketchy eyes, I move next (I'm going alphabetically after Vanderpoel, by the way) to Brian Duey's realistic style.
Mr. Duey's online tutorial is not a lesson in the construction of the eye, nor does it go into detail about why the eye is drawn a certain way. In his own words, the tutorial is intended "to show the different steps that I take in drawing a realistic eye". Duey's ability to photorealistically depict an eye is demonstrated in 15 steps, from the contour drawing to the cleanup and adding of minute details. His tutorial describes how to take a drawing of an eye to the next - or maybe highest - level. Using keen observation and careful use of shading and blending (this was my first exercise in using a blending stump, or tortillon), Duey explains the process he uses to make a "believable looking" drawing of an eye. I can only hope to attain such a level of talent one day.


The first drawing is based on the one in Duey's tutorial; the second was based on a photo of an eye by Dave King.
Mr. Duey's online tutorial is not a lesson in the construction of the eye, nor does it go into detail about why the eye is drawn a certain way. In his own words, the tutorial is intended "to show the different steps that I take in drawing a realistic eye". Duey's ability to photorealistically depict an eye is demonstrated in 15 steps, from the contour drawing to the cleanup and adding of minute details. His tutorial describes how to take a drawing of an eye to the next - or maybe highest - level. Using keen observation and careful use of shading and blending (this was my first exercise in using a blending stump, or tortillon), Duey explains the process he uses to make a "believable looking" drawing of an eye. I can only hope to attain such a level of talent one day.


The first drawing is based on the one in Duey's tutorial; the second was based on a photo of an eye by Dave King.
Wednesday, May 23, 2007
Eye Studies Part 2 - Wendon Blake and John Lawn, "Portrait Drawing: A Step-by-Step Art Instruction Book"
Let me say that in the course of my eye studies, I am going to encounter many different styles of drawing. Some strive for near photorealism, some are more sketchy, and some are more idealized, as I think Vanderpoel's are. The drawings in Wendon Blake and John Lawn's book, "Portrait Drawing: A Step-by-Step Art Instruction Book", are in the middle category. They are almost comic-book like in style, with lots of rough shading done by parallel lines. I intend to mimic the style of each author when following their instructions.
There wasn't much new in this book, I'm afraid, as its instructions are of the Betty Edwards draw-what-you-see school. Not much here on eye structure or why the eye looks the way it does, or even how to draw the iris to give the illusion of corneal transparency. It's really more of a draw-by-the-numbers book.
There are four examples, the front view, the 3/4 view, the side view, and the looking-down view. Each example has four steps to follow: 1) the contour drawing, 2) darkening and rounding out the lines, 3) blocking in tones, and 4) strengthening the tones and adding final details. It illustrates a specific way of shading, which I have tried to duplicate in my drawings. The first, third, and fifth drawings I copied from the book, and for the other two, I followed the steps in the book while drawing eyes from a couple of photos.


There wasn't much new in this book, I'm afraid, as its instructions are of the Betty Edwards draw-what-you-see school. Not much here on eye structure or why the eye looks the way it does, or even how to draw the iris to give the illusion of corneal transparency. It's really more of a draw-by-the-numbers book.
There are four examples, the front view, the 3/4 view, the side view, and the looking-down view. Each example has four steps to follow: 1) the contour drawing, 2) darkening and rounding out the lines, 3) blocking in tones, and 4) strengthening the tones and adding final details. It illustrates a specific way of shading, which I have tried to duplicate in my drawings. The first, third, and fifth drawings I copied from the book, and for the other two, I followed the steps in the book while drawing eyes from a couple of photos.


Eye Studies Part 1 - John Vanderpoel, "The Human Figure"
Since it was Mark Kennedy's post on John Vanderpoel's "The Human Figure" that got me started on my eye studies, I thought that would be the most logical place to start.
Although Vanderpoel's book isn't necessarily a how-to-draw-it book, it goes into great detail about the anatomy of the eye, as well as the structure of the eye socket and the muscles that surround the "orbit" as he calls it. As Mark pointed out, understanding Vanderpoel's descriptions sometimes requires multiple readings, but it's well worth it. He wants the reader to be able to visualize not just the physical aspects of the eye structure, but how shadow and light affect its appearance. Reading this was a little bit like reading philosophy in college - I'd read a passage over and over until I fully understood it. Believe me, it opened my eyes, so to speak.
Here are some eye studies based on Vanderpoel's drawings.


Although Vanderpoel's book isn't necessarily a how-to-draw-it book, it goes into great detail about the anatomy of the eye, as well as the structure of the eye socket and the muscles that surround the "orbit" as he calls it. As Mark pointed out, understanding Vanderpoel's descriptions sometimes requires multiple readings, but it's well worth it. He wants the reader to be able to visualize not just the physical aspects of the eye structure, but how shadow and light affect its appearance. Reading this was a little bit like reading philosophy in college - I'd read a passage over and over until I fully understood it. Believe me, it opened my eyes, so to speak.
Here are some eye studies based on Vanderpoel's drawings.


Subscribe to:
Posts (Atom)