Wednesday, May 30, 2007

Eye Studies Part 4: JR Dunster, "How to Draw Eyes"

portrait-artist.org is "a portrait art tutorial site, with lessons on sketching and drawing faces, tutorials on digital art, an overview of art and drawing techniques, art supplies, book recommendations, anatomy, and much more." JR Dunster has created many tutorials to help aspiring artists who have an interest in drawing portraits.

Dunster's tutorial, "How to draw eyes, step-by-step drawing lesson", demonstrates to the reader how to perceive the eye, as well as how to render it in a drawing. He begins with a description of how to "see" the eye (Dunster recommends Betty Edwards' excellent "Drawing on the Right Side of the Brain" to his readers), using illustrations to show the eye's depth and shape, and reminds the reader not to forget the thickness of the eyelids (or the "tear duct thingie"!), and shows the subtle angles of the top lid. An important point that Dunster reiterates for the reader is that the iris is perfectly round, as is the pupil, which is perfectly centered within it. This seems like a simple point, but it's an important one - I've seen many drawings in which the iris is not round, nor is the pupil correctly centered.

After the overview of what to look for in the eye, Dunster goes into how he renders it, going over shading the iris for realism and shading the eyeball and adding eyelashes.

Ironically, his step-by-step diagram on how to draw the eye is, after four pages of overview, very brief. It consists of drawing an outline, followed by drawing in the lower lid, pupil, and highlight, and then adding shading and detail. To be fair, not only is most of this covered in the preceding pages, but as Dunster mentions, he does expect his reader to have some experience in drawing.

I did appreciate his "quick step-by-step of the eyebrow", which comes next, as it was useful to see how the shading should be deeper below the "brow line".

The last part of the tutorial is a brief description of what to notice when viewing the eye from the side.

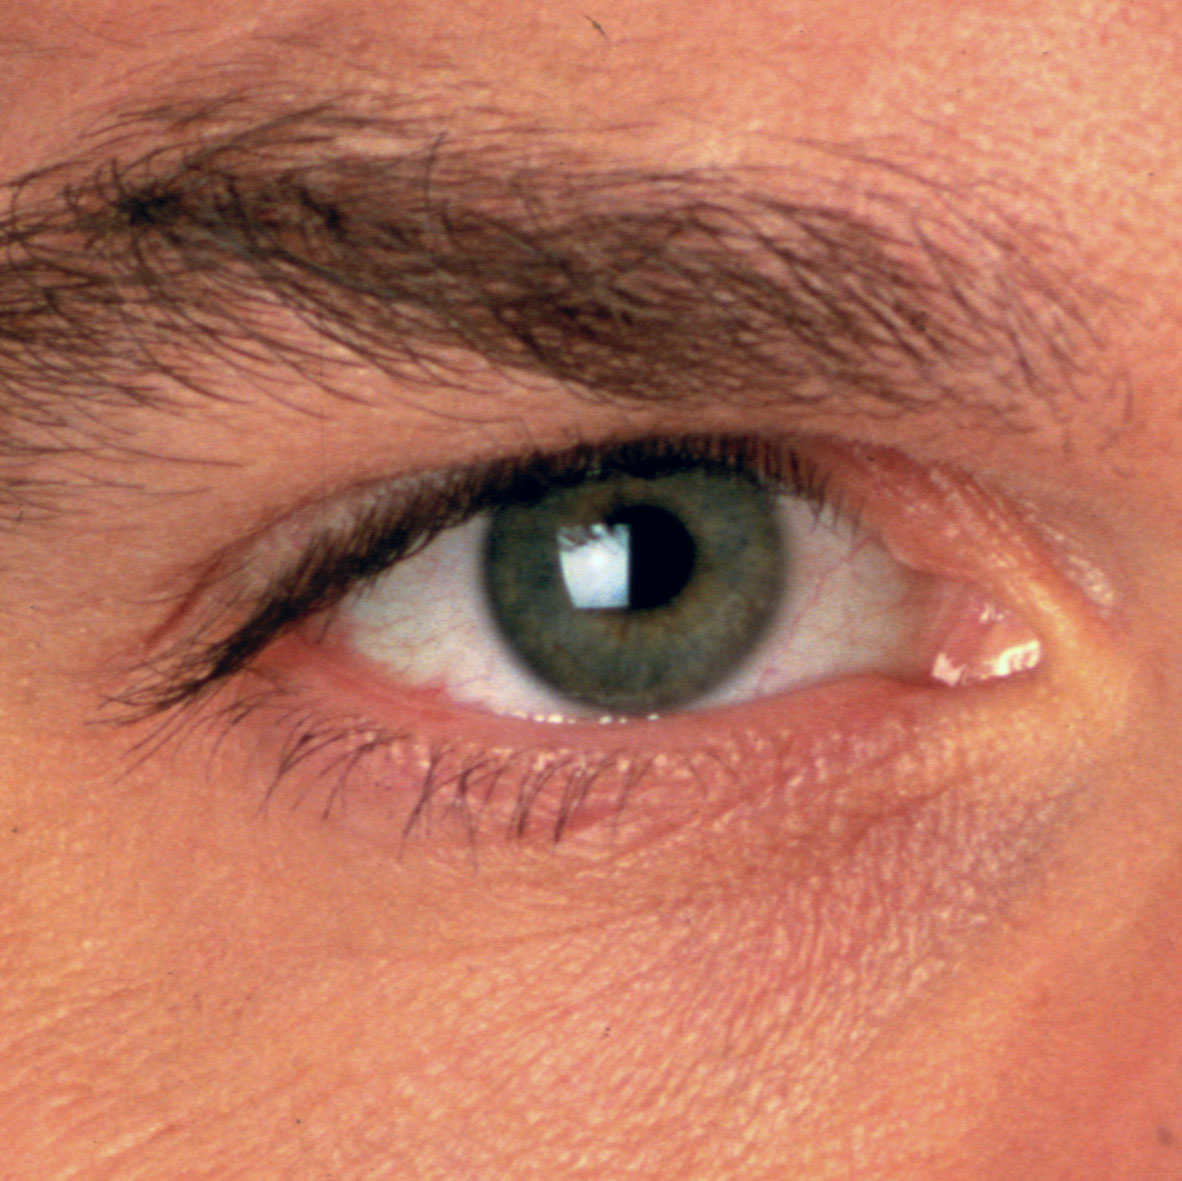
I got many useful bits of information and tips from Dunster's tutorial, including his illustration of the basic shape of the eye (the widest part of the top of the eye is further in than the widest part of the bottom of the eye), and his suggestion about "suggesting" the thickness of the lower eyelid. I also thought it was useful to know that the upper eyelid covers about 1/3 (sometimes more) of the iris, and that the "white" of the eye is actually a "very, very pale peach, or pale greyish-peach" (I'm color blind and would never have noticed that).

Here are my eye sketches following Dunster's tutorial - the first is based on the one he uses in the tutorial, and the second is based on a photo of an eye, using Dunster's steps and mimicking his style.


Up next: Gary Faigin's "The Artist's Complete Guide to Facial Expressions"

Eye Studies Part 3: Brian Duey, "How to Draw a Realistic Eye"

From Vanderpoel's idealized eyes to Blake and Lawn's sketchy eyes, I move next (I'm going alphabetically after Vanderpoel, by the way) to Brian Duey's realistic style.

Mr. Duey's online tutorial is not a lesson in the construction of the eye, nor does it go into detail about why the eye is drawn a certain way. In his own words, the tutorial is intended "to show the different steps that I take in drawing a realistic eye". Duey's ability to photorealistically depict an eye is demonstrated in 15 steps, from the contour drawing to the cleanup and adding of minute details. His tutorial describes how to take a drawing of an eye to the next - or maybe highest - level. Using keen observation and careful use of shading and blending (this was my first exercise in using a blending stump, or tortillon), Duey explains the process he uses to make a "believable looking" drawing of an eye. I can only hope to attain such a level of talent one day.


The first drawing is based on the one in Duey's tutorial; the second was based on a photo of an eye by Dave King.

Wednesday, May 23, 2007

Eye Studies Part 2 - Wendon Blake and John Lawn, "Portrait Drawing: A Step-by-Step Art Instruction Book"

Let me say that in the course of my eye studies, I am going to encounter many different styles of drawing. Some strive for near photorealism, some are more sketchy, and some are more idealized, as I think Vanderpoel's are. The drawings in Wendon Blake and John Lawn's book, "Portrait Drawing: A Step-by-Step Art Instruction Book", are in the middle category. They are almost comic-book like in style, with lots of rough shading done by parallel lines. I intend to mimic the style of each author when following their instructions.

There wasn't much new in this book, I'm afraid, as its instructions are of the Betty Edwards draw-what-you-see school. Not much here on eye structure or why the eye looks the way it does, or even how to draw the iris to give the illusion of corneal transparency. It's really more of a draw-by-the-numbers book.

There are four examples, the front view, the 3/4 view, the side view, and the looking-down view. Each example has four steps to follow: 1) the contour drawing, 2) darkening and rounding out the lines, 3) blocking in tones, and 4) strengthening the tones and adding final details. It illustrates a specific way of shading, which I have tried to duplicate in my drawings. The first, third, and fifth drawings I copied from the book, and for the other two, I followed the steps in the book while drawing eyes from a couple of photos.


Eye Studies Part 1 - John Vanderpoel, "The Human Figure"

Since it was Mark Kennedy's post on John Vanderpoel's "The Human Figure" that got me started on my eye studies, I thought that would be the most logical place to start.

Although Vanderpoel's book isn't necessarily a how-to-draw-it book, it goes into great detail about the anatomy of the eye, as well as the structure of the eye socket and the muscles that surround the "orbit" as he calls it. As Mark pointed out, understanding Vanderpoel's descriptions sometimes requires multiple readings, but it's well worth it. He wants the reader to be able to visualize not just the physical aspects of the eye structure, but how shadow and light affect its appearance. Reading this was a little bit like reading philosophy in college - I'd read a passage over and over until I fully understood it. Believe me, it opened my eyes, so to speak.

Here are some eye studies based on Vanderpoel's drawings.


Thursday, May 17, 2007

May is eye month!


Having finished "Drawing on the Right Side of the Brain" (I admit, I skipped the last chapter about colors. I'm color blind, and I don't have any interest in adding color to my drawings at this point, because it would just mess them up. Besides, I'm mainly interested in learning technique and skills right now, so color can come later maybe.), I was inspired by Mark Kennedy's post on eyes to turn my attention to just that for a while. When I was younger, I would draw whole pages of eyes that I'd find in my sister's magazines. I'm going to focus (pun intended) on them again, starting with the examples from "The Human Figure" by J. H. Vanderpoel, which I just bought. After that, who knows. I intend to study skull structure, follow some of the tutorials I've found online, and take a look (ooh, there I go again) at some of the masters. This will probably take me through June, and from there, we'll see where I go.

Sunday, May 6, 2007

Drawing on the Right Side of the Brain - Portrait - Rod Serling

For my last portrait exercise from "Drawing on the Right Side of the Brain" (I know, I was supposed to use a real live person and one with a hat, so sue me), I decided to draw one of the geniuses of television, Rod Serling. I've always thought he had an interesting face, and this portrait is from his later, "Night Gallery" years.

It's apparent to me that I need to work on my shading more to create a better range of values, and I think I need to work on measuring. I think I'm going to try loosening up my pencil and not pay so much attention to little details. We'll see.


Wednesday, May 2, 2007

My first sketch

With the recent posts on sketching from Temple of the Seven Golden Camels and ASIFA-Hollywood Animation Archive, I was inspired to do something I'd never done before: sketch something from real life. It's true - I have always been intimidated for some reason by drawing something that's live and in 3-D, so I've copied things from print. I know, it's cheating, and real artists would never do such a thing, but I'm not a real artist. I have never gone to art school. I just like to draw. But I'm trying. Please don't hold it against me.

So in order to hone my drawing skills, I got myself a pen and during today's lunch break, I drew a scene from outside my office window. Soon I'll actually venture outside and try drawing people (I work at a university, so there is no shortage of unsuspecting animated young people to practice on). Maybe it's appropriate that for my humble beginnings of sketching, I chose a garbage can. Anyway, without further ado, here is my first sketch (which is also my first attempt at hashing).

Animation School Lesson 5 - Line of Action, Silhouettes - Part Two

Here are some line of action drawings and a silhouette drawing taken from John K's lesson and his post on silhouettes. I hope you like them. How am I doing?


ASIFA-Hollywood Animation Archive: Meta: The $100,000 Animation Drawing Course- Lesson 5